


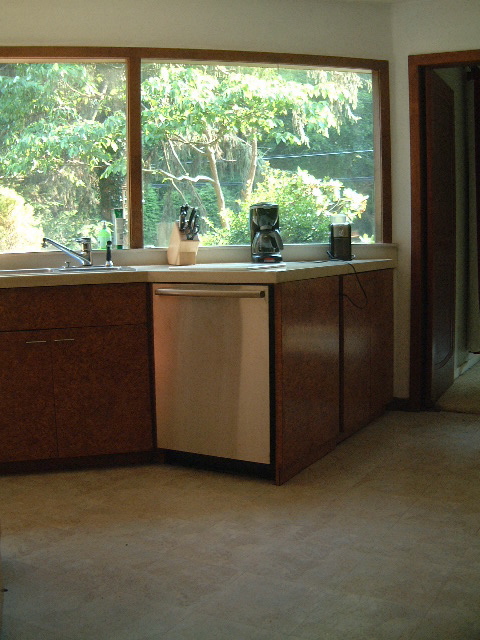
That whole match the cabinet to the picture idea was a real winner - twice over. We took advantage of the carpenter's absence to do a dry run of the cabinets under the window and decided to change the configuration slightly. Then we swapped the images on the window and voila - the carpenter, when he returns, will know exactly what goes where.
By moving one cabinet from the extreme left to the right side of the run we can place the dishwasher next to the sink rather than adjacent. The footprint remains the same but the countertop won't project into the room as far. This will open up in the kitchen even more, so much so that I'm thinking of ordering roller skates and waitress outfit to get around!
Showing posts with label kitchen renovation. Show all posts
Showing posts with label kitchen renovation. Show all posts
Monday, May 31, 2010
On wheels
Friday, May 28, 2010
Pictures speak louder than...

The cabinet installation is motoring along with only one minor speed bump, a confusion over which box goes where. Yes, we do have a labelled plan and diagram but after a fifteen minute search for a missing part that wasn't missing just misplaced to a different part of the kitchen I reckoned things would go a lot faster if I printed images of the finished cabinets and sticky-taped them to the walls in the correct configuration. It worked. No more holding the plans upside down and squinting - just follow the pretty pictures...
Monday, May 24, 2010
Taped

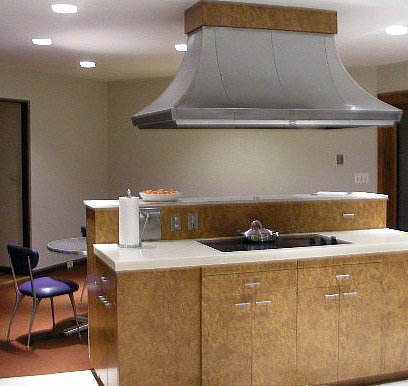
The hardwood floor is down in the kitchen and I spent much of the weekend playing with the placement of the island. In order for it go back the direction it was before we would have had to move the extractor vent to the west by 6 " - and there is a joist in the way! We could "jump" the joist but there would be a lot of holes in the ceiling, possibly some exploratory cuts in the wall behind Verity's bed where the hvac system runs to the exterior blower and it all seemed a lot of work, plus there was the possibility of a reduction in venting power if we had to insert an elbow into the vent pipe. An easier option was to just pivot the island and run it north-south rather than east-west. 
Once it was all taped out something magical happened to the feel of the kitchen, it just fit better in the room - opening it up and emphasizing its trapezoid shape. This room is the same size as the great room but it never felt as large, now the kitchen will be one large area rather than two divided and disjointed spaces. We'll also end up with fewer pinch points than before - by using the full width of the extractor fan cutout the island will be relocated 5" towards the eating area, giving me a 36" pass at the tightest place, everywhere else will have 40" minimum clear. A big selling point is that I'll be able to cook while looking out at the yard - taking in the scenery (and watching the wildlife) from my island in a sea of hardwood.
Thursday, May 20, 2010

Tuesday, May 18, 2010
Gone

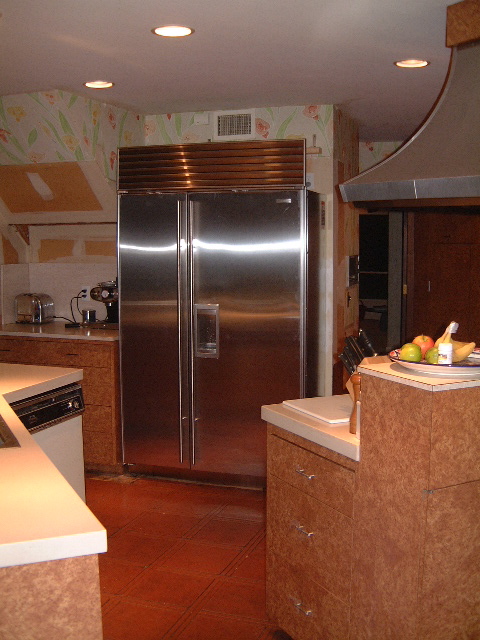
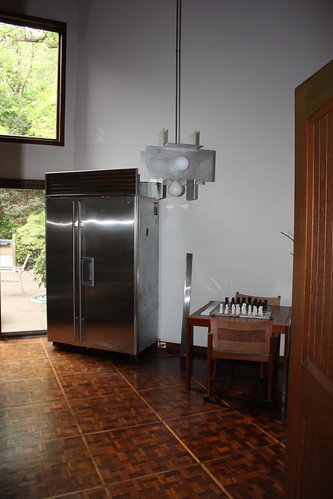
The leaky sink and faucet, huge range hood, beat-up cabinets... all gone. But what about the elephant in the room, I hear you shout? Don't worry, we didn't discard the refrigerator just because it had tested our patience on several occasions. We simply moved* it to a temporary locale...
*four strong guys and a dolly
Sunday, May 16, 2010
Great snakes alive!

Well maybe not snakes per se, just cables that used to service the island. Actually, it reminds me of Medusa's curls* but I digress. Five electric cables plus that huge black insulated one for the halogen cooktop. If you're counting that represents one for the built-in toaster, one for the electric can opener, one for the outlet and one for the range hood... and a spare.
With the island out of the way you can really appreciate the size of the kitchen - we've lived in apartments with less square footage. 
*Medusa may be female but I got a preview of the stony glance that The Guy will be using on the carpenter next time he sees him. It's also the face of a man who gets back from a business trip with a case of Montezuma's revenge and finds he has to rip out a kitchen in 24 hours because said carpenter phoned in sick. If looks could kill...
Saturday, May 15, 2010
Drastic but effective*

All

my

own

work

The Guy is in Mexico, the carpenter let me down three straight days in a row, the floor guy starts Monday and the kitchen needed to be out before he can rip up the carpet/vinyl/plywood. Someone had to do it and it might as well be the woman with the sledgehammer and a raging temper.
*For full-on rage I recommend cranking the volume to 50 and playing Eamon, Green Day, The Fratellis and Macy Grey until the windows shake. And no, I'm not quite over it yet!
Tuesday, March 30, 2010
Kitchen Inspiration

The inspiration for the kitchen is simply the original kitchen here. If it weren't for the chewed up cabinet interiors I would have just replaced the couple of pieces of cracked laminate, installed new Corian/Caeserstone/Cambria/Silestone counters and replaced the floor with something more eco-friendly than stick down vinyl tiles. As it is the shelves are warped and the hinges have been re-screwed to the cabinet sides so many times it looks like a moonscape inside the high cabinets. So it's time to let go and start afresh. 
We were also struck during our tour of the Racquet Estates in Palm Springs by the pairing of inexpensive laminate cabinets (mostly ikea, which I love) and high-end appliances and countertops. The laminate in our kitchen has stood up well to 40+ years of kids, dogs and cooking and today's finishes are even better so this is the way we'll go. I'm also very taken by this kitchen I found while trolling the interwebs - from TurningHouseIntoHome - that has similar window configuration to ours.
After the four month long master bathroom renovation, I want the kitchen to go much more smoothly. This is feasible because there will be no wall tiles or wall board to remove - it's simply a matter of unscrewing the countertops and cabinets, stripping a layer of marine board off the floor, re-flooring, installing the new cabinets and counters and wheeling in the wall ovens, cooktop and island hood. Wheeee! It'll be that easy! I've set a schedule that will be take no more than two months beginning as soon as the replacement window goes in - you know, the one that has the mock travertine formica interior sill that's higher than the outside window frame...
Subscribe to:
Posts (Atom)


